Are you looking to get creative at home?
Below you will find resources and links to guide you in your own artistic journey.
I hope you find something to be inspired by!
I hope you find something to be inspired by!
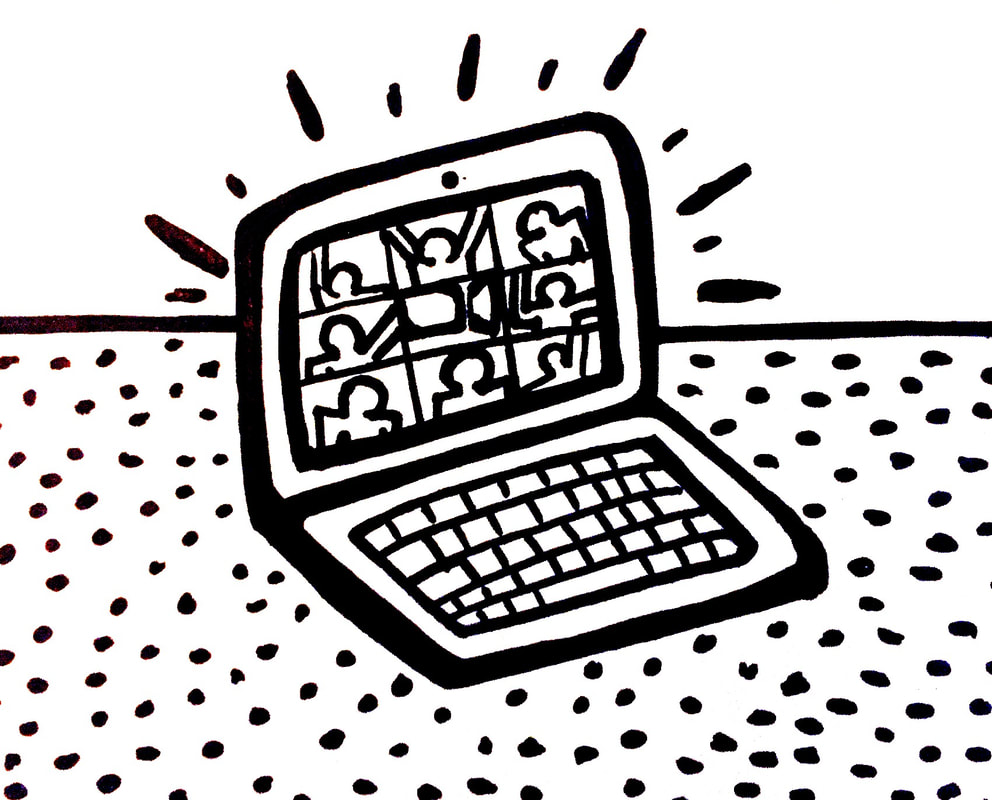
Keith Haring Inspired SymbolsWant learn more about Keith Haring? Click on these Slides to learn more about his life and work. In addition, you can create a personal symbol influenced by Haring's distinctive style. On the right, you can see an example of a Keith Haring inspired Zoom meeting.
|
|
Do like taking photos?Of course you do! Nowadays, everyone is a photographer. We live in a photo-driven world. We like pictures. We like communicating with pictures... Hello, Snapchat! Did you know you don't need a fancy camera to take fancy photos? There are many tips you can learn to improve your mobile photography. Click on the links below to learn more!
|
|
Van Gogh's Letters
|
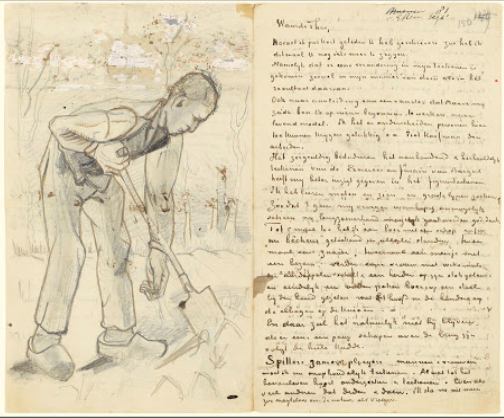
This project requires some imagination! In the first 3 slides, you can see examples of some of Vincent van Gogh’s letters. Remember Starry Night? Van Gogh is the artist who created Starry Night, as well as many, many other magnificent works! Van Gogh was a Dutch artist born in the Netherlands, though he spent the majority of his life living in various regions of France. As you will see in the letter examples, Van Gogh corresponded primarily in French. However, if you look in the notes of the Slides, you will find English translations of parts of his letters. For this project, you will choose one of the options from slides 4-10. Don’t move past slide 10! Choose one of Van Gogh’s letter excerpts to use as a guide to making art. Try to create an artwork based on his description of his work! After you have completed your artwork(s), you can continue looking at the slides. You will find the same letter excerpts from slides 4-10 matched with Van Gogh’s actual paintings. Compare your artwork with Van Gogh’s. In what ways are they alike? And in what ways are they different? Which artwork do you like best?
|
|
Still Life PracticeHave you heard of the term still life? It refers to a genre of art, typically a drawing or painting. It's a practice that began long ago and still continues today. The reason still lifes have stuck around is because they are a great learning tool. Drawing or painting a still life allows artists to improve their abilities by observing from real life, rather than working from a photograph. What makes a still life approachable is that what is being studied is not moving, which makes it easier than working outdoors with changing light and from live models, whom even the best need to move from time to time.
|

|
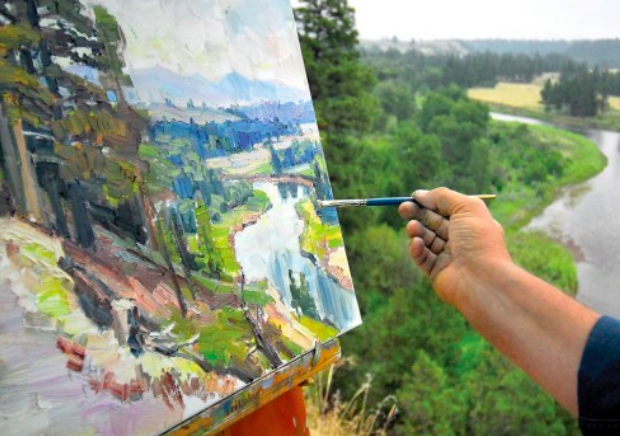
En Plein AirHave you heard of the term en plein air ? It's French for, "in the open air." It refers to the practice of painting outdoors, which began long ago. In 1841, the paint tube was created which transformed this practice. For the first time ever, artists could create a finished painting outside. Do you have any idea what how artists stored their paint prior to the invention of the paint tube? I imagine it's not what you're thinking... Click on these Slides to find out!
|
|
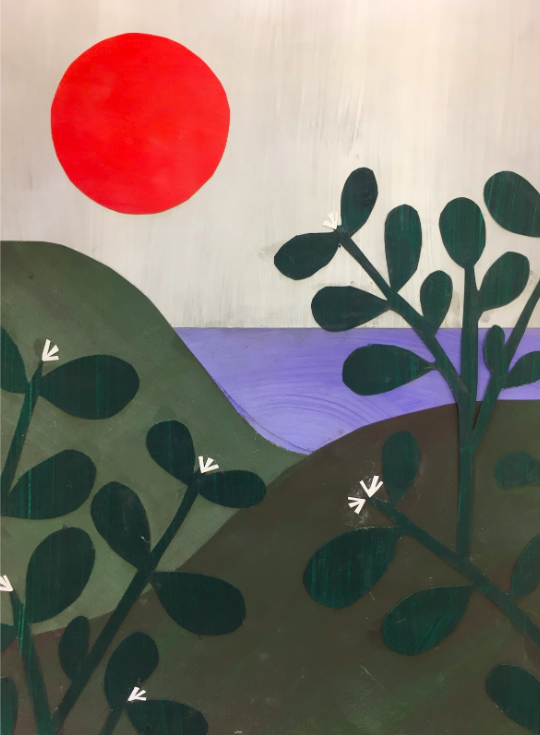
Eric Carle Inspired Collage
|
I designed this lesson with the intention of creating painted papers like Eric Carle does. If you have paint at home, great! Give this a try. If you don’t you can still use these Slides for inspiration. Collages are typically made from a collection of scraps, so you can complete this project with old newspapers or magazines. I suggest beginning with a relatively simple landscape, animal, or object. Collages can be deceiving. It’s a simple method--cut / rip and glue--however, it can be more challenging or time-consuming than you might imagine.
|
|
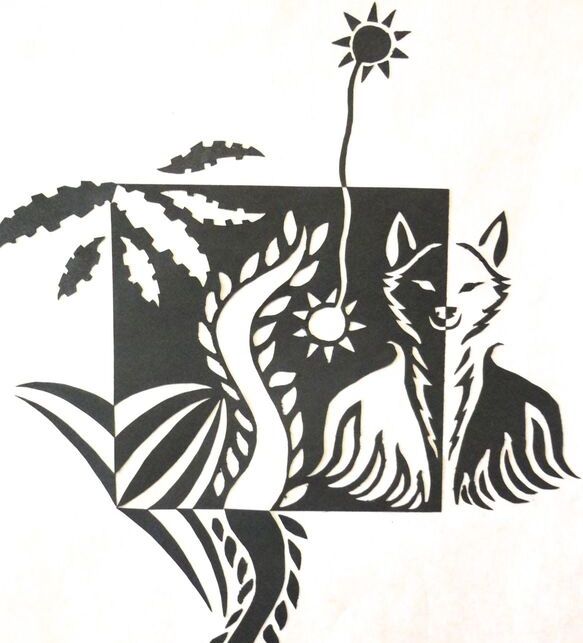
Nōtans
|
Once you get the hang of it, nōtans can be really fun! For this project, you will need two different colors of paper, scissors, and glue. If you only have one color of paper, you can color or paint one of your pieces. Or you could create your nōtan using newspaper as one of your colors. This project is most successful if there is a high contrast between your two colors (white & black, blue & orange, yellow & purple, etc.), but it can be successful if you don’t have those colors. You can find examples and directions on the Slides, but there are also many, many designs online if you search “nōtan."
|
|
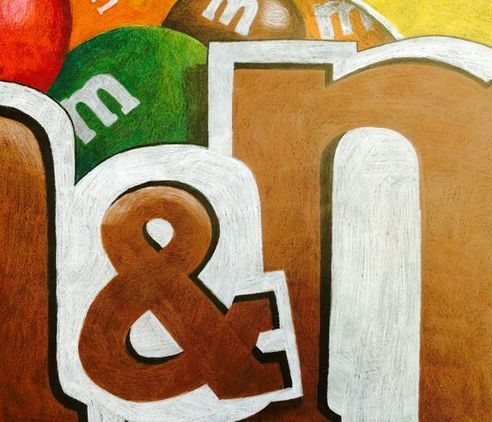
Abstracted Labels
|
For this project, find a label of some sort that you find interesting. Labels can be found on pop cans, candy bars, snacks, and many other places in your kitchen. However, if you’re looking for a challenge, you can find a label or some kind of graphic anywhere you like--on a book, album cover, mug, etc. Find something you like. Then, examine your chosen object. You’re trying to find a small piece of your object to enlarge and abstract. Take a look at Slide 30 to see the various options I came up with all from the same La Croix can. Consider what your best option is. Then begin sketching! If you want your artwork to be a close up, use a small square section of your chosen object and draw it on a large square piece of paper. If you want to get funky, do a little dance and take a square section of your chosen object to draw on a rectangular piece of paper. The longer the rectangle the more funky or distorted your image will be. Maybe try it both ways! If you don’t have any coloring materials at home, use a pen or pencil to focus on the lines. Maybe you decide you like your line drawing or maybe you decide it needs a little more… You could try to fill in the darker shades in dark and leave the lighter tints light practicing your shading. Or you could fill in each section with a different pattern or texture.
|
|
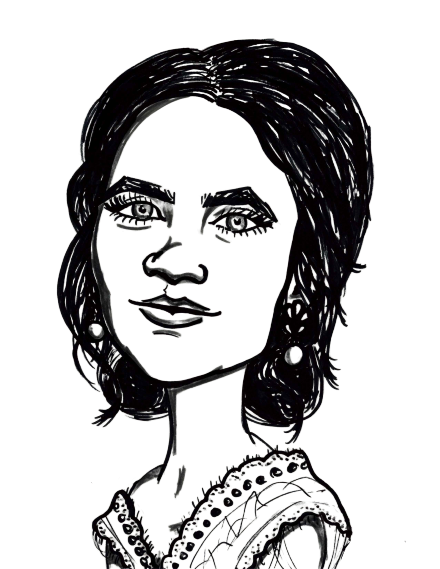
Create a Caricature!
|
Have you ever wondered how caricature artists can create simplified portraits that still look their subjects? I have often wondered how they were able to do that... So, I decided to look up a YouTube video and learn more about their process! In these Slides, I have broken down one artist's process and included additional notes. This process was easier than I was expecting! Can you create a caricature of yourself or someone you know?
|
|
Recreate a Famous Artwork!
|
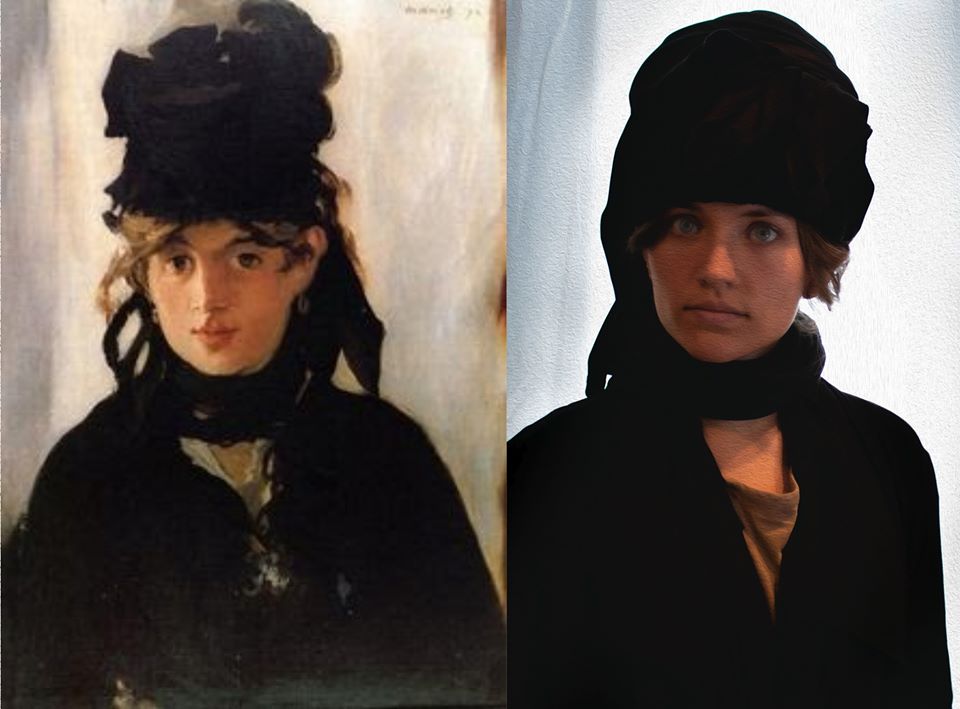
In these Slides, you will find a challenge from an art museum to recreate a famous artwork using objects found around the house. In the slides, you will see that some examples are impressive, while others are good for a laugh. I have included some of my favorites, as well as my own example. However, thousands of people from around the world have participated in this community challenge, so you can find numerous examples online. When sharing your example, include your photo, the original artwork, and the hashtag: #betweenartandquarantine
|
|
Forced Perspective Photography
|
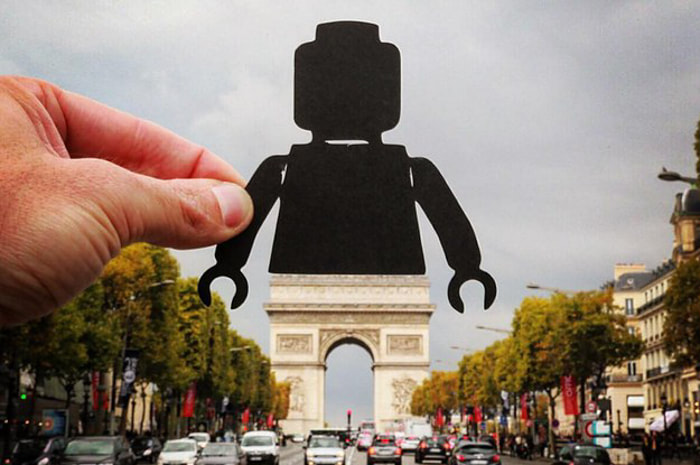
These Slides explain and provide examples of forced perspective photography. You've probably have seen examples before or have even done this before without knowing what it's called... All you need to complete this is a camera of some sort and your imagination. This is also a fun activity to do on vacations!
|
|
Patterned Portraits
|
These Slides show step-by-step photos on how to begin a patterned portrait. However, there are multiple approaches as you will see in the examples. Some artists choose to leave their grid, while others take it out partially or entirely. Some artists use hatching, cross-hatching, or stippling to add value, while others leave it minimal.
|

|
Perspective Drawing
|
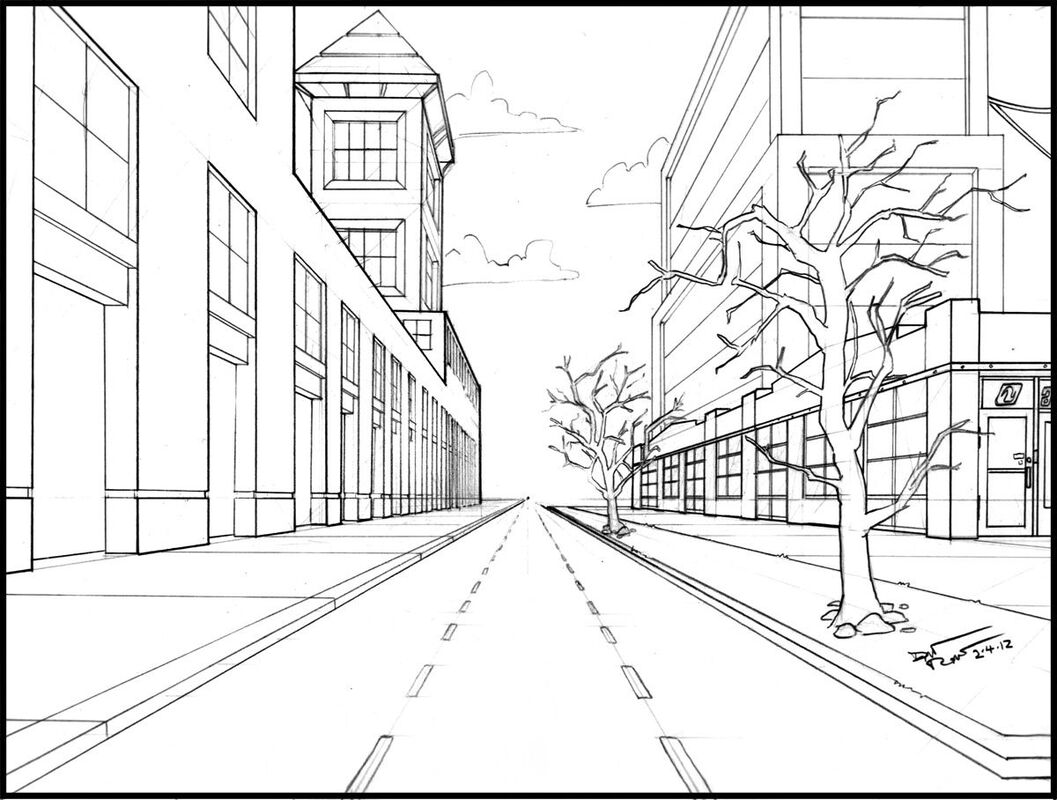
These Slides provide information on vocabulary and basic perspective drawing techniques. This presentation focuses mainly on 1-Point Perspective, but there is some information provided on 2-Point Perspective drawing beginning on Slide 159. I would suggest beginning with a bubble / block letter work and trying to make it 3D. Once you have the basics down, you can begin challenging yourself with cityscapes, landscapes, etc.
|
|
|
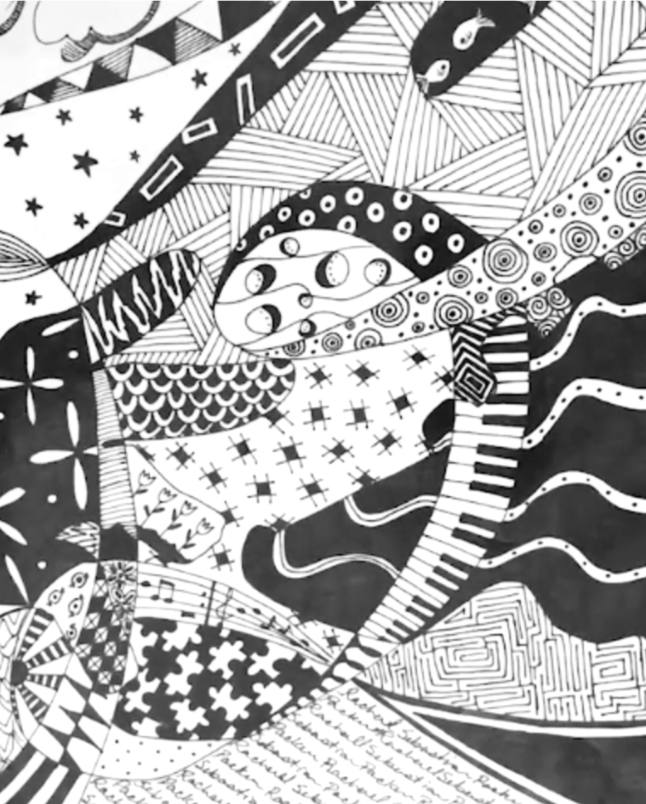
Do you like to doodle? In these Slides you step-by-step directions that will walk you through a doodle activity. All you need is paper and a black marker, though you may decide you need a pencil for sketching and crayons, markers, or colored pencils for adding color to your design.
|
|
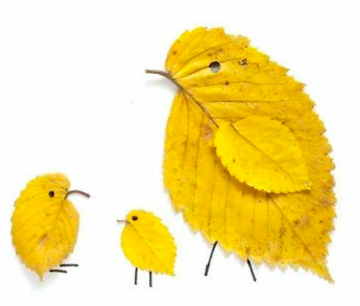
Create Art with Nature
|
These Slides provide examples of artwork created from items found in nature. Take a nature walk or scavenge around your backyard to find things that interest you... rocks, leaves, pinecones, maple keys, acorns, etc. Try to find things without harming nature. Try not to pick leaves or flowers. Then, look through the slides to see examples of things you might create with your findings.
|
|
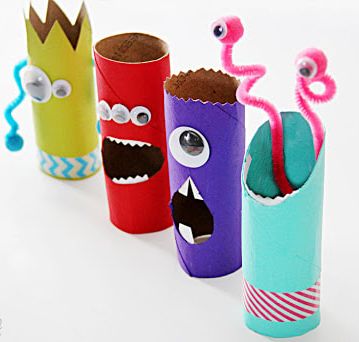
Got Toilet Paper Rolls?
|
This link will take you to a YouTube video created by one of my friends from college. She teaches K-12 Art in a very small school in Iowa. She will show you how to get creative with your empty toilet paper rolls. She created this video using materials that she thinks you might be able to find around the house. If you don’t have some of those materials, pause the video and view it as a challenge to get creative!
|
|
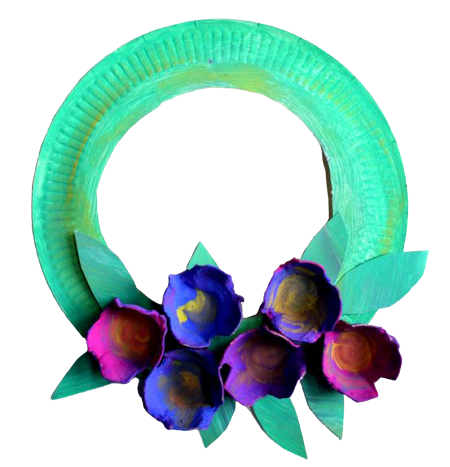
Paper Plate Spring WreathThis link will take you to a YouTube video created by my same friend from above. In this video, she walks you through creating a springtime wreath made primarily out of paper plates and egg cartons.
|
|
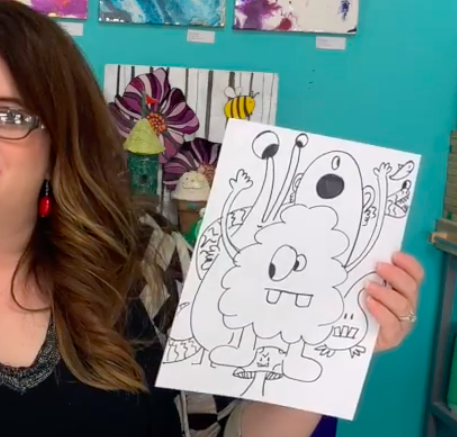
Stories & Doodles
|
This link will take you to a Facebook video created by one of my college instructors. She is very animated! Do you have younger siblings at home? This could be a perfect activity to do together! Ms. Becky will read you a story about monsters and then she will teach you different techniques on how to create your own monster doodle.
This link will take you to another episode of Stories & Doodles with Big Picture Gallery & Studio in North Liberty, IA. Ms. Amy will read Triangle by Mac Barnett and teach you how to create doodles using triangles.
This link to you to another episode of Stories & Doodles with Big Picture Gallery & Studio in North Liberty, IA. Ms. Becky will read Square by Mac Barnett & Jon Klassen. Ms. Amy will teach you how to create square and rectangle doodles.
|
Big Picture Gallery & Studio, North Liberty, IA
Big Picture Gallery & Studio, North Liberty, IA
Big Picture Gallery & Studio, North Liberty, IA
|
Click on the link below to watch Daily Doodles and additional drawing tutorials from
Ms. Becky & Ms. Amy at Big Picture Gallery & Studio, North Liberty, IA.
Ms. Becky & Ms. Amy at Big Picture Gallery & Studio, North Liberty, IA.
Blackout Poetry
|
These Slides provide a little explanation and examples of blackout poetry. You could create a blackout poem using newspaper, magazines, old homework, or whatever available paper you can find with text on it.
|

|
Virtual Tours & Online Exhibits
Virtual Tours
Solomon R. Guggenheim Museum New York City, NY
National Gallery, London, England
The Capitoline Museum, Rome, Italy
The Acropolis Museum, Athens, Greece
Guggenheim Bilbao, Bilbao, Spain
Dalí Theatre-Museum, Figueres, Spain
Online Exhibits
Museum of Modern Art, New York City, NY
Art Institute of Chicago, Chicago, IL
National Gallery of Art, Washington DC Washington, D.C.
The J. Paul Getty Museum Los Angeles, CA
Musée d’Orsay, Paris Paris, France
Musée de l'Orangerie, Paris, France
Paris Museums Collections, Paris France
National Museum of Modern and Contemporary Art, Korea Gwacheon-si, South Korea
Van Gogh Museum Amsterdam, Netherlands
Uffizi Gallery Firenze, Italy
MASP - Museu de Arte de São Paulo Assis Chateaubriand São Paulo, Brazil
Picasso Museum, Barcelona, Spain
50 Online Art & Music Related Resources
This website has links to several places for your online creative needs. There are descriptions after each link to let you know what you can expect to do at each website. There are examples for all ages!
Looking for a challenge?
Try this digital Escape Room that will test you on your knowledge of the elements and principles of art!
Paint with Vegetables!
Homemade dyes are a great way to get more out of your kitchen scraps and teach kids about sustainability.
First, decide what color dye you want to make. Some of this might be dictated by what you have on hand. You'll want about a cup of the fruit or vegetable scraps like onion skins, carrot tops, or squashed blueberries. Food52 shares some suggestions for what plants can produce what colors:
Then, place your chopped vegetable or fruit into a small saucepan and cover with water. Use twice the amount of water to the amount of fruit or vegetable. Heat to a boil, then simmer for about an hour. Let water cool to room temperature and strain. Now your handmade dye is ready to use!
First, decide what color dye you want to make. Some of this might be dictated by what you have on hand. You'll want about a cup of the fruit or vegetable scraps like onion skins, carrot tops, or squashed blueberries. Food52 shares some suggestions for what plants can produce what colors:
- Pink. Strawberries, raspberries
- Red. Beets, red berries, tomatoes
- Orange & Yellow. Onion skins, turmeric, carrots, sweet potatoes, paprika, saffron
- Green. Spinach & leafy greens, matcha
- Blue. Red cabbage + baking soda
- Purple. Blueberries, purple sweet potato
- Brown. Used tea bags, coffee
- Black. Activated charcoal, squid ink
Then, place your chopped vegetable or fruit into a small saucepan and cover with water. Use twice the amount of water to the amount of fruit or vegetable. Heat to a boil, then simmer for about an hour. Let water cool to room temperature and strain. Now your handmade dye is ready to use!
See original post HERE.
Make Baker's Clay!
Make your own clay with household ingredients! After you’re finished sculpting, bake it in the oven.
Recipe 1
Ingredients
4 Cups All-Purpose Flour
1 Cup Salt
1½ Cups Water
Directions
Recipe 2
Ingredients
½ Cup Cornstarch
1 Cup Baking Soda
¾ Cup Water
*Optional: Food Coloring
If you want colored dough, add food coloring to the water before you mix it in.
Directions
Recipe 1
Ingredients
4 Cups All-Purpose Flour
1 Cup Salt
1½ Cups Water
Directions
- Preheat the oven to 350° F.
- Mix the flour, salt, and water in a bowl. Knead dough until smooth. Roll out dough and cut into desired shapes.
- Bake at 350° F for 1 hour.
- Once cool paint with colors, if desired.
Recipe 2
Ingredients
½ Cup Cornstarch
1 Cup Baking Soda
¾ Cup Water
*Optional: Food Coloring
If you want colored dough, add food coloring to the water before you mix it in.
Directions
- In a medium sized pot, combine cornstarch, baking soda, and water. Stir over medium heat. After a couple of minutes, the mixture will begin to thicken. When it looks smooth, like mashed potatoes, remove the pot from the heat.
- Spoon the ball of dough into a bowl and cover it with a damp cloth or plastic wrap until it's cool. When it's cool, knead it on a smooth surface until smooth and silky. Add more cornstarch if it feels too sticky and/or sticks to the surface.
- Roll dough and cut into desired shapes.
- Your creations can dry overnight in a warm place or you can bake them immediately.
- Preheat the oven to 175° F. Line the baking sheet with parchment paper.
- Bake clay for about 1 hour, flipping them over after 30 minutes if possible.
